Wednesday, June 16, 2010

Chuckle Head


My first Spinner Card (from a Splitcoaster tutorial) - and I am IN LOVE (again). These cards are mesmerizing....and it's just not me, everyone who fiddled with this card nearly started drooling......spin, spin, spin, spin, spin, spin, spin, spin, spin, spin, spin.
Oh and the spinner subject? Well what can I say, my creepy girl does love her skulls..........
Stamps - Inkadinkadoo, Just Johanna, Hero Arts
CS - Papertrey Ink & CTMH
Inks - Memento, Versafine & Colorbox Chalks
White Detail Embossing Powder

Tuesday, June 15, 2010

A BIG Celebration!


Do you remember turning 18?? I do....and a week after I graduated from high school I had moved out and had gotten a full-time job. NOT the future I want for my daughter by any stretch of the imagination. Her dad and I have gone to great (and expensive) pains hoping to keep her at home and in school. Currently she doesn't have the mindset to traipse off to college, she's pretty nestled down here at home and is happy (and more importantly EAGER) to attend a local college. That's more than ok with me - I shudder to think at how much I'd miss her.
When I found this stair-step card tutorial (yes, it's another one from Splitcoasters), I made one for a b-day celebration. As soon as Creepella saw this (in March), she said, "Mom, I'd BETTER get one of these cards for my birthday week!!" Ahhhh - I've raised a spoiled brat - I'm so proud!!
Here's a quiz - do you see any stamping??? Well there's a wee bit on the card but mostly, MOSTLY it's an entire package of 3-D stickers strategically placed through-out the steps. Bright pink for my baby girl and ta-dahhhh, we're done!!

Stamps - CTMH
Ink - Memento
CS - Papertrey Ink
Punches - Martha's loopy border & Marvy's scalloped circle
3D Stickers - Michael's $1-bin

Monday, June 14, 2010

Pocket Posies

Pocket card intact....


Weird sideways photo (making up for that pesky thing called gravity) of the pocket mostly slid out....
Back again this week for a few more cards. Love pocket cards, they're so fun and easy and....... I very rarely remember to make them. What's up with that?? I find a new card and blaze through several designs until I find the next NEW card and the cycle starts again.
This card was quick and easy to make since I use some flower "left-overs", the only thing I had to do was a bit of stamping, a few quick punches with Martha's grass border punch and toss in a bit of ribbon and some gemstones. It was nearly as quick to make as it was to describe.
Power to the Pocket Card!!!
Stamps - CTMH & A Muse
Pattern CS - A Muse
Punches - Martha Stewart grass border & butterfly; Marvy & EK Success florals; corner rounder
Ink - Memento
Ribbon - A Muse
Gemstone - Hero Arts & Michael's Dollar Bins

Thursday, June 10, 2010

Little Card - BIG Cheer

Here's my only 3 x 3 card......took about 5 minutes since I had the penguin stamped, colored and cut out!! Used a scrap piece of CS and added some ribbon, stamped the sentiment in black and Ta Dahhhhhh - it's done!

Stamps: Memory Box Gift Penguin; sentiment - G-Rated Rubber stamps
Ribbon - A Muse
Cardstock - PTI
Ink - Memento
Copics & Spicas

Wednesday, June 9, 2010

Fluttering By


While this is actually a 4-bar sized card, it took quite a bit of time to create due to the experimentation (punched one edge of the green Stardream CS, flipped it over and keeping the punch going in the same leaf "direction" and staggering the starting area, punched the CS again to create a "vine") with the Martha Stewart's new branch border punch. When I finally got the the right spacing it came together really quickly. Just a bit of stamping on the card, but it makes a nice finish.

Punches: Martha Stewart Branches border; Hydrangea; Butterflies
Stickers: Martha Stewart
Stardream CS
Stamps: Sentiment - CTMH; butterfly trail - PTI
Ink - Memento
Spicas

Tuesday, June 8, 2010

3 Feline Cheers

Two sweet girly kitties (aka Lily & Iris)


And then there's Bob!!
This is a "Wiper" card - found it on the Splitcoast Stampers site. There are TONS of excellent ideas and tutorials on that website. I am horrid at following written directions but if a few photos are added, then I'm good to go. I have a large binder completely devoted to various tutorials/ideas that I've found on Splitcoasters. If you ever have "stampers block" - go to that website and your head will be absolutely spinning with ideas!!
How's that for a card intro?? Ironic that I had planned on making cute, small and simple cards for Creepella's b-day week and ended up making several interactive cards (this wiper card being the first one). Don't you just love how the wiper part just pops up as a fun surprise?? I was so enamored with these cards I made one for Chef Bo-Bo Head (a baking-inspired b-day card) and then I made 20 party invitations for Creepella's b-day/grad party (the wiper pop-up was a skull with a graduation cap.....really turned out well). For this card, I thought the kitters would be a great theme and not surprisingly, I had just the right kitty B&T handy. The little orange butterfly hanging out with "Bob" started making an appearance in several of the b-day card week cards.......she likes butterflies, I like orange - it was perfect!!
Stamps - sentiment by The Cottage Stamper, Inc.
Various feline-themed B&T papers
Stardream CS
Heart Brad - Making Memories
Heart gemstone - A Muse
Versamark Ink Pad
Detailed White Embossing Power
Martha Steward butterfly punch
Deckle-edged scissors

Monday, June 7, 2010

Bubbles, Bubbles, Bubbles...

Had these little penguins stamped, colored and cut out for ages.......and I've had this "bubbly birthday wishes" for quite a long time too. What finally prompted me to use these items? Needing 6 new cards in 6 days was a great nudger.....

Used a few circle punches and punched some additional bubbles out of Stardream CS and then of course globbed on so much Stickles that you can't tell about the Stardream.....oh well. Can you see the bubbles that I stamped oh-so subtly on the cardbase??? It's VERY subtle....probably too subtle....... But I liked how it turned out and I think I'll make a few to put into the "For Sale" basket and see how they do.

Stamps - Memory Box Blowing Bubbles Penguin; Sentiment - The Cottage Stamper, Inc; Background "bubbles" - Savvy
Inks - Memento
Stickles
Various Circle punches - EK Success
Stardream CS

Sunday, June 6, 2010

Blowing By

Wow, been busy and sick and busy and POOF, like the above blow fish, there goes your month!!

Card 1 of the B-day Week for Creepella. It's such a cute stamp and one of those really CHEAP stamps at Michael's.......on a trip there in early May, I found 8 adorable designs (all mostly an "oceany" theme) that I had to add to my collection - at this point this one is the only one that I've used. Creepella liked it so much I ended up getting one for her for her b-day week (how convenient). The trickiest part of Mr. Blow fish? Cutting out all of his spinney-goodness....but it was definitely worth the effort. The wavy B&T paper was a perfect fit and luckily I had a piece just the perfect size after I trimmed the top off of the waves. I popped out the fins with foam tape to make the fish "hold" the balloon strings........pretty clever, eh??

Well, it's good to be back and whew, what a relief to have a few cards to share over the next couple of weeks. Hope some of them will inspire you (or at least make you giggle!!).

Stamps - Snag 'em Blow fish; CTMH Sentiments
QuicKutz balloon die cuts
B&T - Waves paper (?? can't remember the designer)
Ink - Memento & Colorbox Chalk
Copics & Stickles

Monday, May 10, 2010

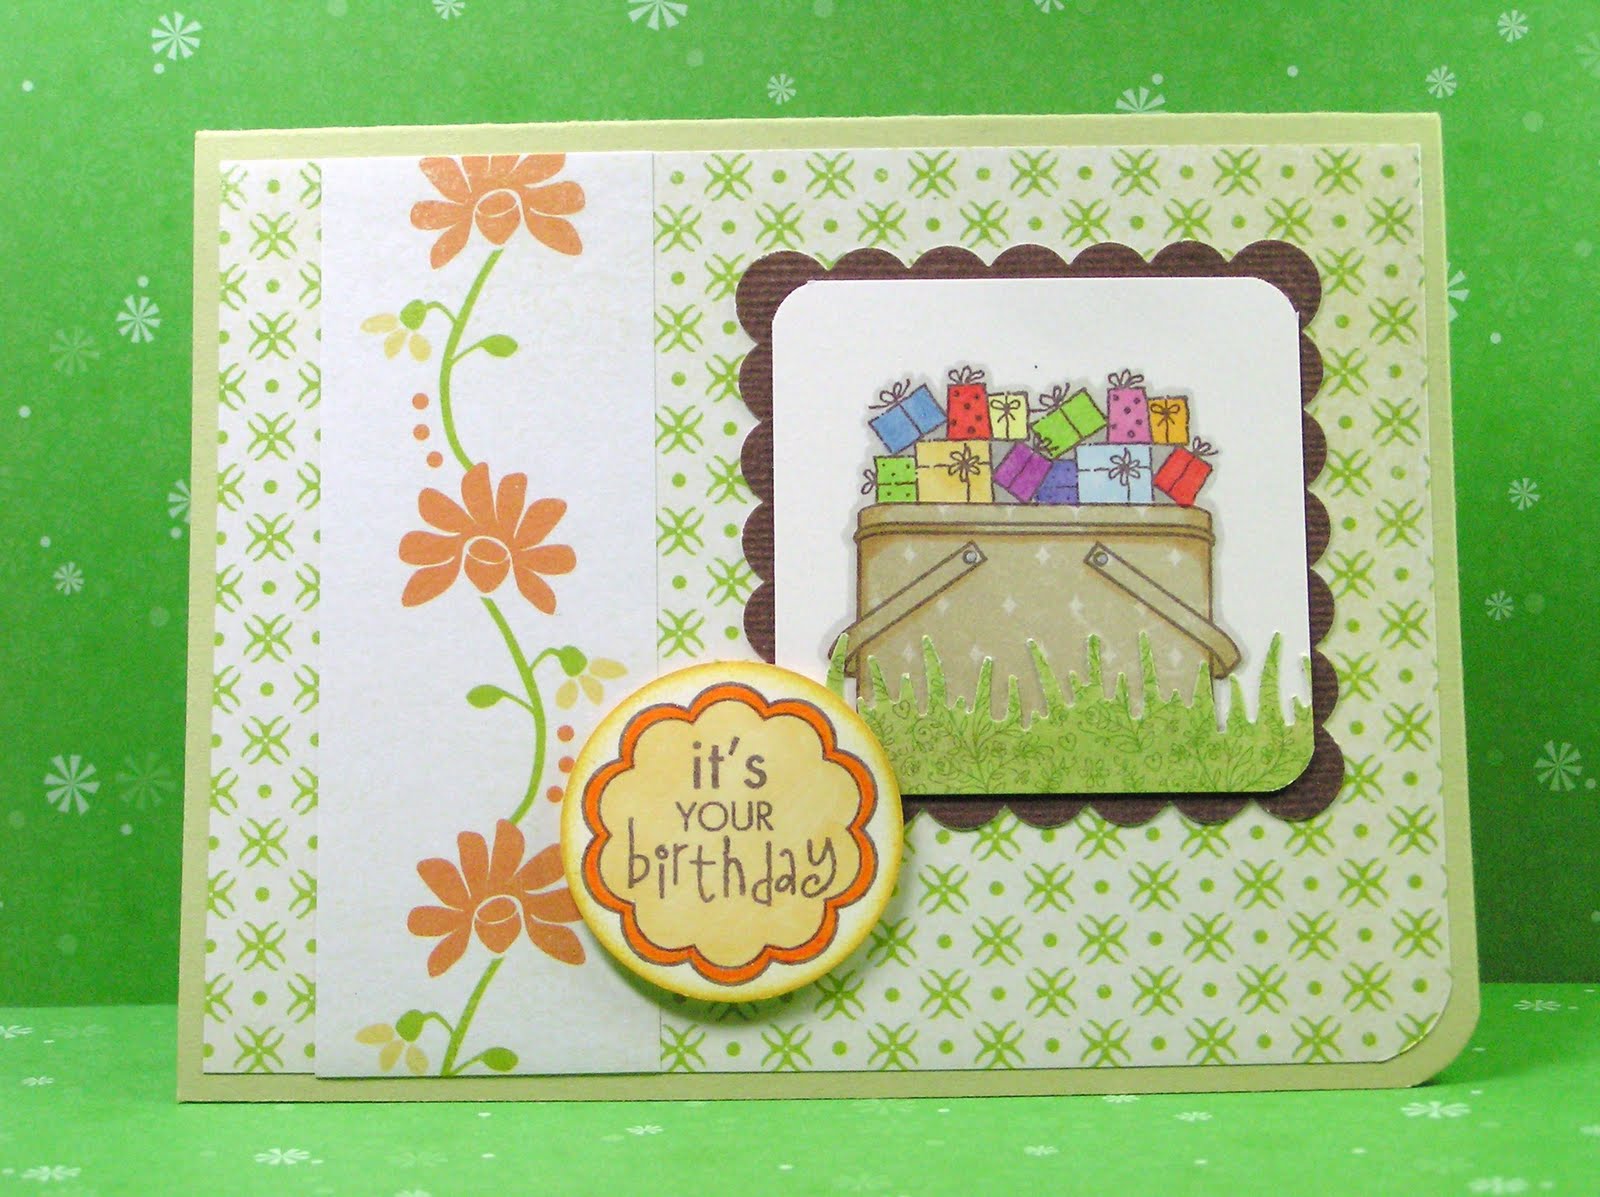
A Tisket A Tasket


Oh that was fun to type - the next time I get a pair of sibling kitters, I'm naming them Tisket and Tasket......man, I hope I remember that when the time comes!!

This was my attempt at being Springy.....I think it worked. Aren't those little gifties in the picnic basket cute?? And Clever??? Remember the Stampin' Up pick-up truck's accessories? Well, this gifties stamp is from that set. A little masking and wow, that's a whole lot of gifties just ready to pop from the basket!!

For this card, I used loads of stuff but it all ties in together pretty well. I stamped the basket itself onto some B&T paper and then used a couple of Copics to add some shadows, using the Martha Stewart grass border punch on some BasicGrey B&T paper makes the grass pretty lively. The B&T from Chloe's closet has a few sheets that can be cut as strips or borders - how convenient, don't you think?? Those handy dandy Marvy punches are a mainstay for me and so ding-dang handy, they're worth their bulkiness!!

Stamps - Papertrey Ink; Hero Arts; Stampin' Up
B&T paper - Chloe's Closet; BasicGrey; CTMH
Textured CS - CTMH
CB - Classic Crest Neenah Classic Cream
Punches - Martha Stewart border punch; Marvy circle & scalloped square; EK Success corner rounder

Thursday, May 6, 2010

Mom's Day Card #5


Ok, I admit it - this card looks as if a flower fairy had a bit of indigestion and womited up her lunch.

But I try and keep in mind that not everyone has my simpler-is-better design taste and that maybe, just MAYBE someone will love, Love, LOVE this card (and buy it).......the design definitely didn't transfer from my head to my hand what I intended but after using the border floral punch on the precious Kioshi paper, I was committed and I'm no quitter (unless I'm tired or it's too hard or I might sweat......).

Staying positive - I really do like the Kioshi paper from BasicGrey so I guess that makes up for most everything else. That and if you mostly squint, it doesn't look quite as busy (or like flower fairy womit...)!!

Stamp & ribbon - A Muse
Flower Punches - Marvy, EK Success & Martha Stewart Border
Butterfly Punch - Martha Steward
Oval Punch - EK Success
Inks - Memento & Colorbox Chalk Inks
B&T paper - BasicGrey's "Kioshi"
Cardbase - Memory Box

Wednesday, May 5, 2010

Mom's Day Card #4


Wow - unintentionally - this is pretty much a completely A Muse'd card!!!
Little to no stamping but what stamping there is really sets off the card. Up front is the beautiful Damask CS (it shimmmmmmmers so), Martha's border punch (I'm calling it "Iron Gate" because that's what it looks like to me.....but I'm certain that's not the official name) sets the regal tone so perfectly and the little orange Twinkle stickers on the tiara are the perfect touch!!
Stamps - A Muse
Inks - Memento & Colorbox Chalk Inks
Damask CS & Twinkle Stickers - A Muse
Punches - Martha Stewart border punch; Stampin' Up Oval; EK Success Larger Oval
Stardream CS

Tuesday, May 4, 2010

Mom's Day Card #3


Hmmm, kind of dark, but I like to think of it as elegant........

One of the things I love about stamping - there are so many cool techniques that it's always like Christmas in that you can re-discover a favored technique and be completely delighted with it all over again. Do you think I'm nuts??? Ah well it's a lot of fun in my world.

A Muse stamps have been a mainstay in my stamping arsenal ever since I discovered them 7 years ago. Didn't know exactly WHAT I had discovered, all I knew was that I loved these cute little designs. Not long after that, in a stamping magazine I saw a card that Julie Ebersole made (using A Muse stamps) and that was the official beginning of my love of A Muse stamps!! The bummer part was the LSS didn't carry A Muse (I know, shocking but true....!!!), I couldn't find a catalog - I was in sheer desperation (remember, I wasn't nearly as computer savvy as I am now and since I'm mostly a nit-wit NOW, well you can only imagine how inept I was then...). Went to a local rubber stamp convention with Creepella (her first time, poor thing) - found a whole mess of A Muse stamps at the "Stamp On Over" booth (not sure if they're still around), spent nearly every cent there....... about two hours later I emerged triumphant in my cache of A Muse stamps. Truly......didn't have a dollar to spend at any other booth - Creepella was hot, tired and sick to death of hearing my insane mutterings, whimpering, squeals of delight and anguish cries of despair. Nearly 8 months later, I found the A Muse bonanza at The Paper Garden AND finally found A Muse's website.

My life was nearly complete.

Used the "spot-light" technique using A Muse's Mum stamp (after all it is for a Mum's Day card...). After deciding on the B&T paper, I selected the Copic markers and had at it. I also used a zig-zap fold for the card base (probably not the proper term but it makes sense to me), it serves as a bit of interest since there's no ribbon (WHAT??!!!???). In hindsight, I'd stamp a sentiment on the lower right corner of the cream front panel but since these cards are long gone, I'll have to keep it in mind for next time.


Stamps - A Muse
B&T Paper - BasicGrey's "Indian Summer"
Colored Cardbase Panel - CTMH (Vineyard Berry)
Inks - Memento & Colorbox Chalk Inks
Punches - Martha Stewart's scalloped border; Marvy corner rounder; Stampin' Up - Circle

Monday, May 3, 2010

Mom's Day Card #2


Not a typical Mom's Day card perhaps but I like it......AND it's very similar to card Creepella made for me last year (aaaahhhhh, how sweet!!). The sentiment is in Japanese but inside the card (sorry, forgot to take a shot of it), the English translation is stamped ("forever in my heart") along with "Happy Mother's Day".
The oh-so cool origami papers & tape are from Japan, brought to me from my mom on one of her many trips to Japan. The tape is probably 10 years old because I had NO idea what it was or what the heck to do with it (remember all of the description/instructions are in Japanese). Of course now I'll only be using it sparingly since I most likely won't be getting any additional rolls.
With Mother's Day coming up I'm grateful for being a mom (especially when I have a wonderful kid), but it's another reminder that my mom is now gone (at least in the earthly sense).....miss her a lot.
Stamps - CTMH
Ink - Memento
Washi B&T paper
Origami Paper & Tape - brought from Japan by my Mama-san

Sunday, May 2, 2010

Mom's Day Card #1


Can't really tell (guess I shouldn't have used such a bright green in my background), but the cardbase is really a soft yellow - NOT the sickly yellow that it seems!!
Still having fun using the circle punches for things aside from just plain ol' circles. It's always fun to see what the B&T papers will turn out too. In this card, I'm using some CTMH B&T paper (one side has a floral pattern, the other side is a coordinating solid color) and I stamped a little sentiment on the outer edge of each "petal". Once all of the petals were folded, it was quick and easy to put them into a circular patten. Added a bit of foam tape to pop out the tag and flower's center, a scrap of ribbon adds some interest and I think the most time-consuming part was cutting out the flower's center. How about that - a fast and easy card, go on - make a dozen or so!!
Stamps - CTMH, Savvy
Ribbon - A Muse
Punches - Circle (CTMH); Tag (Martha Stewart); Corner (Marvy)
Inks - CTMH & Mementos

Saturday, May 1, 2010

Newly Acquired Equipment...

Ok, these are the new prizes that I've been clutching tightly in my hand......and you know which one is my VERY favorite?? "Pearl White".....I know it doesn't look like much, but experience tells me THAT'S the marker that I'll be reaching for again and again and..........again. Of course the other ones aren't bad either - I'm finding that I'm quite drawn to "Anise" as well - it's a funny little color but one that I think will be used up dry in no time at all.

And how in the hey did I get a hold of these luscious NEW (well, at least to me) colors?? Well, I'll tell you!! I'm sure I've mentioned a few times that I consider myself to be a lucky woman - I've met some remarkable business women in my life and wow, knowing them has really given me some unique opportunities. For instance, Stephanie - owner of the Paper Garden (a LSS) asked if I was available to be "teacher's assistant" when Linda Carnell (owner of A Muse Art Stamps) was doing a stint as Guest Instructor. [Sadly, when Linda's classes were first announced, I knew I wouldn't be able to take them so I kind of ignored the whole thing (yep, I'm a mature one....)]. A deep intake of breath, a very high-pitched squeak later and then seconds after that a frantic call to Chef Bo-Bo Head to see if the class times were clear on the family calendar (obviously I was beside myself with glee and couldn't possibly think in a reasonable fashion) and oh baby - I was SOOOOO THERE!!! As I told Steph in my email response, "I will ALWAYS work for stamps & accessory items!!". Because the offer was to assist Linda in her two Copic classes and in exchange I would take her other two card classes AND obtain 8 new (or new to me) Copic Originals......The Stamping Fates were smiling my way!!!


And here are the cards we made in the two card classes. It's too tough to pick my favorite card - I really like them all. It was TONS of fun using some of the stamps from A Muse's new release (really hoping one day they'll be a set of CLEAR stamps for those of us who are really trying to cut down on our wood-intake.....slivers, dry rot, termites and all that.......)


A close-up of the cards.........I didn't take a photo of each individual card because I'm a weird-O and I feel funny about doing that.......I know, I know........hey, I've already admitted to being slightly odd......

And a photo of the rest of the cards.........see, it's too tough to pick out a single favorite!!
I haven't taken a card-making class in several months so I completely luxuriated (been watching waaaaaay too much of the Firefly CDs lately......) in the classes. I was able to see and visit with a lot of stamping peeps that I hadn't seen in too long - that was wonderful. Since A Muse stamps are one of my top 3 most favorite stamps, the classes were pure heaven. Linda is a fun teacher, encouraging, low-key but steadily handing out nuggets of stamping gold and hey, it's LINDA - from A MUSE!!!
Did I mention how very lucky I am??? Thanks to Stephanie and Linda for this wonderful opportunity!!
Unbiased endorsement (I make no money, earn no extra pens, etc - just sharing some stamping info): if you have the opportunity to take Linda's Copic Class - especially if you're a bit intimidated by the whole Copic scene - take the class. I heard more students say it was SOOOO worth the class price. I personally love Copics and have been slightly fanatical about gaining every last ounce of info on them but I actually picked up a couple of tips in the class as well.......there, I have spoken!!